Generative Design and Quantum Computing: Part 2#
Welcome to the second installment of our series on introducing quantum computing to designers and creatives, particularly those in generative design. In this post, we’ll use the concept of turtles in computer graphics to visualize quantum circuits and entanglement. A turtle, in this context, is a simple graphical entity often used in programming to draw lines or shapes by moving in a specified direction. It’s a helpful way to represent motion and patterns visually, making abstract concepts more accessible. By treating these abstract quantum mechanics as a medium for drawing, we aim to make the concepts more tangible and provide a jumping-off point for creatives to explore and utilize this emerging technology. The turtle provides an intuitive bridge between these abstract ideas and their visual representation, allowing us to map quantum operations onto clear and compelling graphical patterns.
Our goal is to bridge the gap between the deeply technical literature surrounding quantum computing and the creative possibilities it unlocks. Through visualization, code, and artistic expression, this tutorial will introduce the fundamentals of quantum superposition and entanglement. We’ll offer accessible explanations, complemented by visual snippets and a link to the full code for those who want to dive deeper.
Generative design often starts with the designer building a parametric or algorithmic model of their design or system. These models allow for the manipulation of parameters and the creation of relationships between them, representing complex interdependencies within a design or material system. For example, an architect might use a parametric model to explore how structural configurations impact spatial aesthetics, or an artist might use algorithms to generate intricate, rule-based drawings. These vast parameter spaces, with their many entangled properties, can be daunting to explore fully. As we move through this tutorial and delve into more advanced examples, keep in mind how critical this ability to manipulate and explore parameter relationships is—it’s a cornerstone of both generative design and the potential applications of quantum computing.
In this tutorial, we will use Cirq, a Python library developed by Google, to simulate quantum circuits. Cirq provides tools for designing, simulating, and optimizing quantum algorithms, making it ideal for exploring quantum computing concepts.
Visualizing Quantum Superposition with a Quantum Turtle#
In quantum mechanics, superposition allows a qubit to exist in multiple states simultaneously. This idea may feel strange at first, but it is one of the main differences between quantum computing and traditional computing. A qubit is the fundamental unit of quantum information, similar to a bit in classical computing, but with the ability to exist in a combination of states rather than just 0 or 1. This ability to exist in multiple states at once will become especially important later as we discuss search and optimization. Here is how we create a qubit in code:
# Initialize a qubit on a 2D grid
qubit = cirq.GridQubit(0, 0)
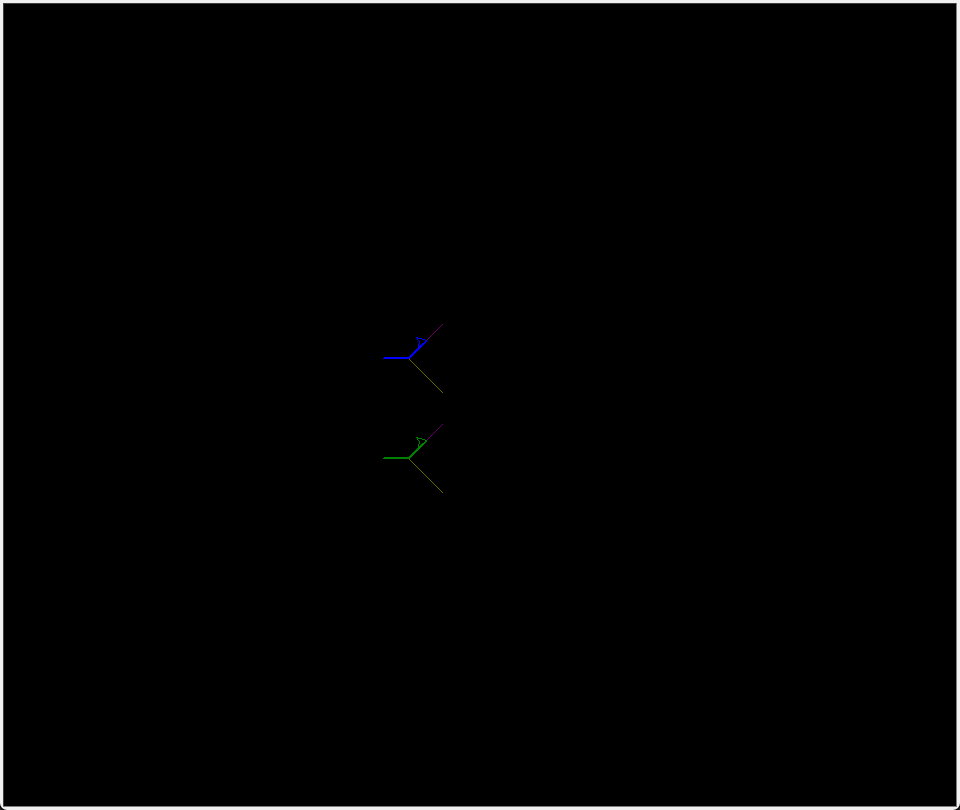
We’ll demonstrate this concept by creating a “Quantum Turtle” that uses quantum randomness to decide its movement. A GridQubit is used here because it allows us to position qubits on a 2D grid, which is helpful for visualizing and organizing qubits in more complex quantum circuits. The randomness stems from the measurement of a qubit in superposition.
Superposition#
A qubit in a superposition of |0⟩ and |1⟩ has equal probabilities of collapsing to either state upon measurement. By using this randomness to guide a turtle’s movements, we create a visualization of the probabilistic nature of quantum mechanics.
We start by applying a Hadamard gate, which puts the qubit into superposition. Upon measurement, the qubit collapses to a definitive state, which we use to determine the turtle’s direction. For example:
- |0⟩ could move the turtle +45 degrees.
- |1⟩ could move it -45 degrees.
Hadamard gate#
Here’s how we implement the Hadamard gate and measurement in code:
# Add Hadamard gate to create superposition
circuit.append(cirq.H(qubit))

# Measure the qubit, collapsing the superposition
circuit.append(cirq.measure(qubit))

# Run the quantum circuit
simulator = cirq.Simulator()
result = simulator.run(circuit, repetitions=1)
measurement = result.measurements['q(0, 0)'][0][0]

The result determines the turtle’s movement direction, creating unique paths that visualize quantum randomness. To see the full implementation and how it generates artistic patterns, check out the GitHub repository.
Introducing Quantum Entanglement#
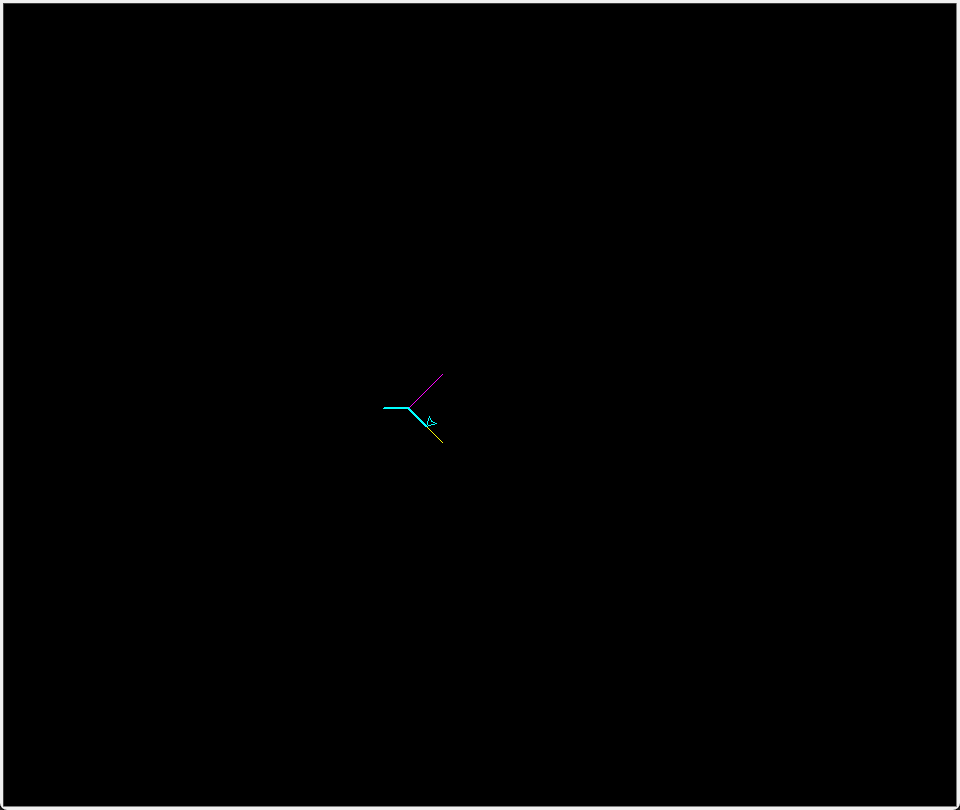
Quantum entanglement is one of the most fascinating phenomena in quantum mechanics. When two qubits are entangled, measuring one instantly determines the state of the other, no matter the distance between them. To visualize this, we extend our Quantum Turtle concept to include two turtles representing entangled qubits.
Entanglement#
Entanglement links two qubits such that their states are perfectly correlated. By creating entanglement using a combination of a Hadamard gate and a CNOT gate, we put the qubits into a Bell state. The Hadamard gate creates a superposition on the first qubit, and the CNOT (Controlled NOT) gate uses the first qubit to control the second qubit, flipping its state if the first qubit is in state |1⟩. Together, these operations result in the creation of a Bell state:
$$ \text{Bell State} = \frac{|00\rangle + |11\rangle}{\sqrt{2}} $$
Measuring one qubit determines the state of the other. For example, if qubit 1 collapses to |0⟩, qubit 2 also collapses to |0⟩, and the turtles move in synchronized patterns. We will get more into building quantum circuits in the next post. For now you can see our quantum gates reference guide for more information.
CNOT gate#
Here’s how we create entanglement:
# Apply Hadamard gate to qubit1 to create superposition
circuit.append(cirq.H(qubit1))

# Apply CNOT gate to entangle qubit1 and qubit2
circuit.append(cirq.CNOT(qubit1, qubit2))
Once entangled, measurements reveal the perfect correlation between the qubits. For instance:
# Measure both qubits
circuit.append(cirq.measure(qubit1, key='q1'))
circuit.append(cirq.measure(qubit2, key='q2'))

# Run the quantum circuit
simulator = cirq.Simulator()
result = simulator.run(circuit, repetitions=1)
measurement_q1 = result.measurements['q1'][0][0]
measurement_q2 = result.measurements['q2'][0][0]
These synchronized measurements guide the movements of two turtles, visualizing quantum entanglement. The resulting patterns are not just visually stunning but also showcase the unique properties of quantum mechanics. For a complete implementation, visit the GitHub repository.
Creating more complex movements#
This simple turtle example is a great way to start exploring quantum computing and generative design. However, it is limited by the fact that the turtle can only move in a single direction at a time. By using multiple qubits, we can overcome this limitation and create more complex patterns and movements.
Using multiple qubits allows us to generate random angles through binary encoding, enhancing the Quantum Turtle’s capabilities. Each qubit contributes a binary digit (0 or 1), and with 4 qubits, we can represent numbers from 0 to 15 (2⁴ - 1). The measured binary number is converted to an angle as follows:
This approach not only makes the Quantum Turtle’s movements more intricate and varied but also introduces an essential concept: representing more complex data structures using quantum states. As we move forward in this series, understanding how to encode and manipulate more elaborate structures will become increasingly important. These principles will lay the foundation for exploring advanced topics such as optimization and multi-dimensional parameter spaces in quantum computing.
- Binary Representation: Combine the measurements of the 4 qubits into a single binary number.
- Normalization: Divide the binary number by 16 to map it to a range between 0 and 1.
- Angle Calculation: Multiply the normalized value by 360° to generate a rotation angle.
For example:
- If the qubits measure
0110(binary 6):- ( 6 \div 16 = 0.375 )
- ( 0.375 \times 360^\circ = 135^\circ )
- If the qubits measure
1111(binary 15):- ( 15 \div 16 = 0.9375 )
- ( 0.9375 \times 360^\circ = 337.5^\circ )
This encoding ensures 16 evenly spaced angles between 0° and 360°, each determined by quantum measurement. Here’s how we implement it in code:
# Create 4 qubits for rotation
self.rotation_qubits = [cirq.GridQubit(0, i) for i in range(4)]

# Add superposition for rotation qubits
for qubit in self.rotation_qubits:
    self.circuit.append(cirq.H(qubit))

# Measure rotation qubits
self.circuit.append(cirq.measure(*self.rotation_qubits, key='rotation'))

# Convert binary measurement to rotation angle
rotation_bits = result.measurements['rotation'][0]
rotation_value = sum(bit << i for i, bit in enumerate(rotation_bits))
rotation_angle = (rotation_value / 16) * 360  # Angle between 0° and 360°
As you can see the turtle can now move in a random direction. For a complete implementation, visit the GitHub repository.
Conclusion#
By combining quantum mechanics and generative design, we can unlock new creative possibilities. These exercises demonstrate how quantum computing concepts like superposition and entanglement can be visualized and explored through art. My hope is that these drawings and sample code will help make these very abstract ideas more “material” and encourage more people to start building these types of systems. As we progress in this series, we’ll continue to demystify quantum computing and empower creatives to embrace this exciting frontier.
Please try out the code, experiment with the parameters, and let us know what you create. Next, we’ll explore how quantum computing can be applied to optimization problems, offering exciting possibilities for generative design and engineering.